Finishing a basement is one of the most practical ways to expand your living space without building an addition. A well-planned basement can become a family room, home office, guest suite, or entertainment area. The key is approaching the project methodically, with attention to moisture control, safety, and building codes. This guide breaks down how to finish a basement in a clear, homeowner-friendly way.
Start With a Careful Assessment
Before any construction begins, inspect the basement’s condition. Look for water stains, damp smells, or cracks in walls and floors. Moisture issues should be fixed first, since finishing over them can lead to mold and long-term damage. Check ceiling height, window placement, and access points as well—these factors affect layout, lighting, and whether the space meets local code requirements.
Plan the Layout and Purpose
Decide how you want to use the space. A clear purpose helps guide layout, electrical needs, and lighting design. In the planning stage, it’s helpful to research finishing basement tips that focus on traffic flow, storage placement, and zoning areas for quiet or active use. Sketch a rough floor plan that includes walls, doors, furniture zones, and utility access.
Handle Permits and Codes Early
Most basement finishing projects require permits for framing, electrical, plumbing, and sometimes insulation. Local building codes often specify minimum ceiling height, emergency egress windows, and fire-rated materials. Addressing these rules upfront prevents costly changes later and ensures the space is safe and compliant.
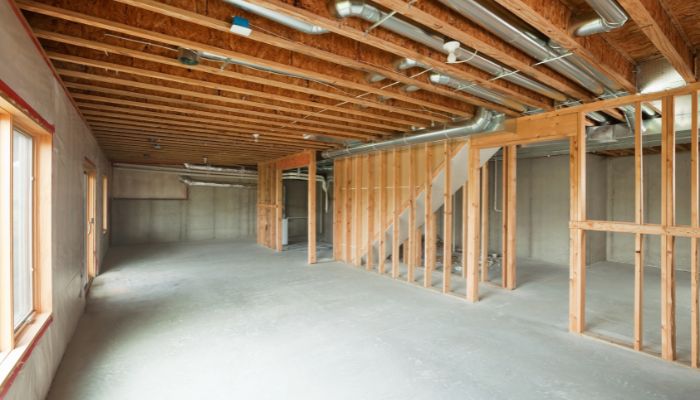
Seal, Insulate, and Frame
Once planning is complete, prepare the foundation. Seal walls and floors with appropriate moisture barriers, then install insulation suited for below-grade spaces. Proper insulation improves comfort and energy efficiency. Framing comes next, creating the structure for walls, doors, and rooms. This stage sets the foundation for many popular basement finishing ideas, from open layouts to defined rooms.
Electrical, Plumbing, and HVAC
After framing, rough-in the electrical wiring, plumbing lines, and heating or cooling ducts. Think ahead about outlet placement, internet access, and lighting zones. Basements often benefit from layered lighting—recessed lights combined with wall sconces or lamps—to avoid a dark, closed-in feel.
Drywall, Flooring, and Ceilings
With inspections complete, install drywall and begin finishing surfaces. Choose flooring designed for basements, such as vinyl planks, engineered wood, or sealed concrete. Drop ceilings or drywall ceilings can both work, depending on whether you want easy access to utilities. At this stage, the space finally starts to resemble a true basement finish rather than a construction zone.
Add Lighting, Paint, and Trim
Light colors on walls and ceilings help reflect light and make the basement feel larger. Trim, doors, and built-ins add polish and make the space feel connected to the rest of the home. Simple design choices often deliver the most impact when exploring practical finish basement ideas.
Final Touches and Safety Checks
Install smoke detectors, carbon monoxide alarms, and proper ventilation. Walk through the space to ensure outlets, lighting, and doors function as intended. Once complete, the basement should feel comfortable, safe, and flexible for changing needs over time.
Why a Step-by-Step Approach Matters
Finishing a basement isn’t just about aesthetics—it’s about durability, safety, and usability. By addressing moisture control, planning carefully, and following each phase in order, homeowners can create a finished basement that adds real value and everyday function to the home.